How to Create a Photo Wall
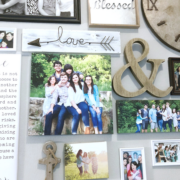
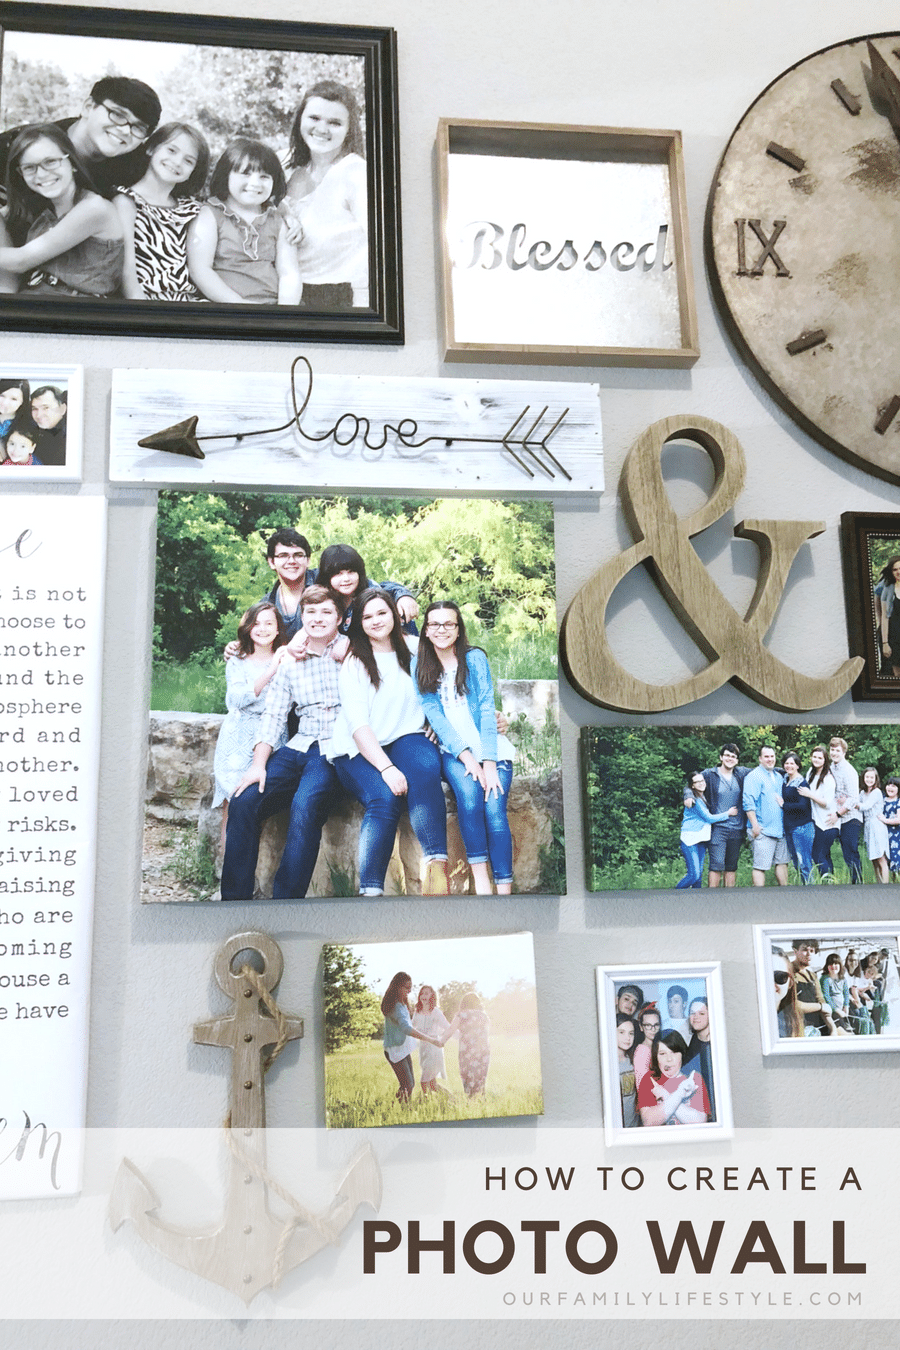
One of the first things our guests notice upon walking all the way into our home is the photo wall leading up our stairs. It was the first wall display I put together when we moved in and had dreamed of it for months.
Create a Photo Wall
When I saw the stairwell, I knew it would be fabulous for many reasons. For starters, it would make the perfect “prom photo” location as the girls grew older, and, second, it would hold a great photo gallery.
This post may contain affiliate links, which means I’ll receive a commission if you purchase through my links, at no extra cost to you. We are a participant in the Amazon Services LLC Associates Program, an affiliate advertising program designed to provide a means for us to earn fees by linking to Amazon.com and affiliated sites. [Learn more]
We have a few years before the prom photos start, but the photo wall could happen right away.
Photo walls are an interesting and fun way to display groups of photos, wall art, and decorative decor embellishments. There have been many unique ideas for photo walls in recent years, and most work well as long as they reflect your unique and personal decorating style.
If you like photo walls, but are unsure how to put one together, this guide will help you get started.
Choose the Photos to Be Displayed
When you are creating a photo wall, the first step is deciding which photos will be showcased. Will you make a collage of family photos or perhaps romantic moments with the love of your life? Maybe you are making a photo wall of your kids, or maybe yourself and your friends.
Decide which photos you may want to use and gather them all in one place. grouped by the ones you absolutely want, and the ones that are optional. Prune the non-essential photos until you have only the photos that you know that you definitely want included. Put them in a pile for now.
Decide if you want to edit any of the photos before committing to hanging. If they are digital, it makes things easy. Think about whether you prefer the pictures to be in color or black or white… or a mix of both.
Even if your photos are prints, technology allows us many options and new ways of making necessary edits to the photos we possess.
Don’t forget to choose word art, canvas pieces, and other small embellishments to add texture and diversity to your wall.
Decide Where to Put the Photo Wall
This may be something you’ve already decided on, like I did during our build process. Take everything into consideration, for example do you want it in a high-traffic area, or a cozy space? Is there a large wall that needs to be filled?
With all of the preparation, time spent hanging, and dedicated hanging holes, you want to make sure you choose a location you are committed to.
Make Cardboard or Paper Templates
Once you have your final group of photos pruned down to the very best and in their final form (frames, etc), trace their shapes onto cardboard or construction paper and cut them out. Arrange these templates on the wall, over and over until you find a grouping arrangement that suits your fancy.
You will now have an idea of exactly where your photos should sit in the display. Using tape, adhere the templates to the wall and prepare to hang your photos.
Hang the Photos
Finally, you are ready to hang the photos on your photo wall. Using the template on the wall, add the nails, thumbtacks, Command Picture Hanging Strips, or other photo hangers to the wall.
Next, with all the photos ready and in their frames., place each one of them where you decided upon. Finally, take a step back and enjoy your photo wall for the first time.
Photo walls are a great way to enjoy your memorable moments on a daily basis. They make your home feel cozy and personal. Your photos walls will be admired by the visitors to your home for years to come. Grab some photos and create your own photo wall today.